

Baking for the dogs!
So, my newest doggy is fitting right in to our family.

He's fun, playful, energetic... and a bit tiring! He can run ALL day! I hear that Min Pins are just fun like that.
The only (tiny) downer is that he is highly allergic to wheat. As in, the first week we had him, he got into the cat treats and cost $123 at the vet for medications to bring down the rash and itchyness!! The allergy is not a big deal, really, since we were already feeding our bigger dog the same wheat-free food (Origen) that Capone was eating - it's only the treats that are problematic. Grain free treats are easy enough to find at most pet stores, but the selection isn't so great, and they're not particularly cheap!
So, like any intrepid dog-lover, I decided to bake up some wheat-free treats for the pooches, and see if they compare to store bought ones. What do you think of the final product??

They're really cheesy-smelling, and they hold together fairly well. They're crunchy, and the doggies love them.
OK...so they love pretty much anything that's edible....but they seemed to REALLY like them! I have no pics, since they snapped them up so fast!
I've got some photos from the process, if you're interested. And I'll write out the recipe at the bottom of this post.

The dough. It was stickier than I expected. The recipe called for not nearly enough water and I kind of improvised. Since it got kneaded a bit more on a rice-floured counter, it stiffened up a bit.
I forgive you for thinking that it looks grey and disgusting, because it did.

I used a tiny (1 1/2 inch) heart-shaped cookie cutter. I wished I had a small dog bone shaped cutter....I guess that means I get to go shopping for one! The flour was still sticky, and after rolling out the first batch, I found I really needed to get rice flour under the bit I was rolling, even part-way through. A good trick is to flop a corner of the rolled-out dough over the rolling pin (that is above the dough) and gently pick it up with the pin, so you can re-flour under the dough. Otherwise, it sticks pretty badly.

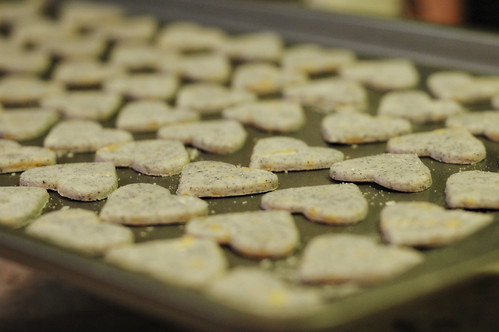
And they cooked up fairly quickly! I just watched to make sure the cheese didn't burn. I didn't actually watch the time. You can cook them longer than these in the next photo, but it doesn't matter. They were crispy anyway.

I adapted a recipe from a book I photocopied some years ago and had never used. If you've never used rice flour (like I hadn't) it's a little gritty and seems to take more water than I expected....I never did measure just how MUCH water, so you'll have to just keep adding until it's good!
You'll need:
2 1/2 cups rice flour (plus extra for rolling)
1/2 cup black bean flour
1/4 cup skim milk powder
1 cup grated cheddar cheese (packed semi-loosely into the cup)
2 tablespoons extra-virgin olive oil
Warm water (the recipe calls for 3/4 of a cup, but trust me when I say it's just not enough!)
Preheat oven to 375 degrees Farenheit
Mix the flours, milk powder and cheese. Add the oil, and then the water, starting with about a cup and mixing in more a bit at a time until you get a firm dough. I wish I knew how much I used! Don't worry though - you can add a little more flour if it gets a bit sticky. Plop dough out on to a counter that's liberally floured with rice flour (you may want to work with a third of the dough at a time. I found it much easier) and knead until it is thoroughly mixed. Flour the surface again, as well as your rolling pin, and the top of the dough. roll out to about a 1/4 inch thickness, and then cut with a cutter of your choice. These don't really spread during baking, so they can be placed quite close together, although the cheese does melt out a bit. Cook until golden on top, or until the cheese gets crispy - whichever comes first. (the recipe says 10-15 minutes, but that sounds like too long!) Unstick the cookies from the pan with a spatula, and then place the cookies back into the oven with the heat OFF, to get even more crispy and cool until morning.
And there you have it! They jumped all over me for the treats....but then, I don't have finicky eaters. If you do, and they like the cookies, let me know!
I'm not sure how long these will be good for - the recipe recommends keeping them stored in the fridge in an airtight container - but since we're a treat-friendly family (hey....food-motivated training, anyone?) and I'm apparently living on the edge, we'll keep them in a sealed container on the counter and I'm sure we'll use them all up before they get a chance to go bad!
Hope you all have a good week!
And HI to my family in Germany!! I'm glad you like the apron :o) Happy birthday!!! Love you!
0 comments:
Post a Comment